- Show results for
- Share
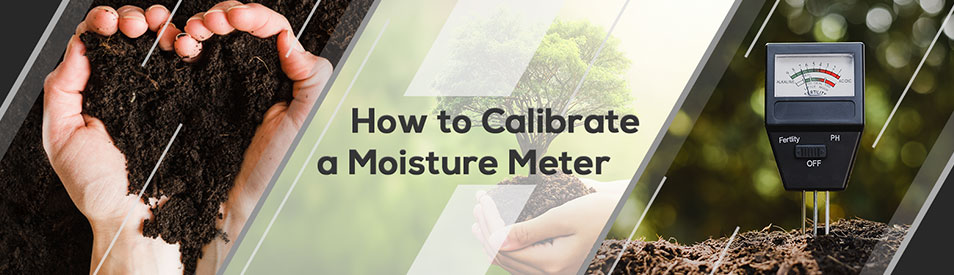
How to Calibrate a Moisture Meter
Resource Description
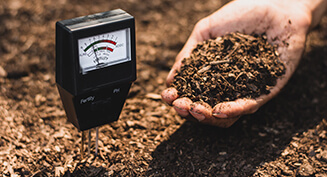
Moisture tester is an essential tool that is used in many working spheres to determine moisture concentration in agriculture, woodworking, construction and many other industries. Most moisture testers are calibrated to wood which offers precise wood moisture concentration.
The use of a moisture meter is essential for maintaining optimal productivity in some industries. Nevertheless, the accuracy of results depends on careful handling, cleaning and calibration checks. AgraTronix is one of the most trusted manufacturers of moisture testers.
Why is the Calibration is so Important
One of the most critical issues when making moisture measurement is to be sure that the moisture tester is in a proper calibration for you to get correct readings. When the device is not calibrated properly, you may get false readings and even +- one or two % points off may cause an important damage to the quality of your work. That is why checking the calibration of the moisture meter is a significant working responsibility.
The moisture meter has varied principles of measurement for different types of the items you want to measure. That is why it is also important to know what type of moisture meter you are going to use.
Some moisture meters include built-in calibration tests allowing you to determine the accuracy of the device with a simple press of a button. At the same time, the moisture meter calibration test is not as simple as it is expected, because there can’t be built-in calibration on your device or you will probably need to check the calibration by the manual that is included with your device.
Furthermore checking the calibration readings of the device is necessary while replacing the battery; the tester hasn’t been used for a long time; the tester has been used for several times in a row.
Furthermore, running a calibration check is necessary
- replacing the battery
- the tester has not been used for a long time
- the tester is used several times in a row
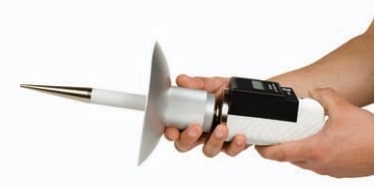
How to Calibrate AgraTronix 07120 HT-PRO
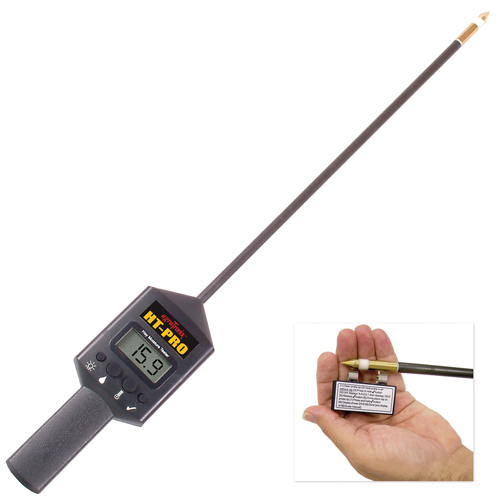
The HT-PRO model tests the moisture grade of stored hay. After the baling working process the hay is stored and awaits sale. With a hand-held tester, such as HT-PRO you’ll have the opportunity to put the probe into the bale and measure the level of the moisture concentration effortlessly.
Step 1:
Clear the probe tip. Press and hold the ✓ button and the device will start counting down from 5 to 00,0 on the display. Release the ✓ button.
Step 2:
Fix the calibration clip 07156 on to the probe tip as it is shown below and hold the ✓ button one more time. The tester will show 24/8% on the display indicating that the device is being calibrated.
*Note: If the tester shows 99,9 error on the display during the calibration, it means that the error has happened. Try to restart the calibration from the beginning.
*Note: A calibration clip (07156) is used only with a pin-type moisture meter.
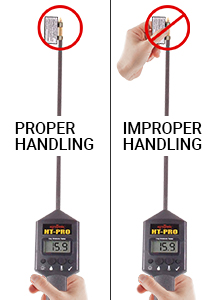
*Warning: Don’t hold the clip with your hands during the calibration process. Doing so, the tester will show the 99,9%.
How to Calibrate AgraTronix 08160
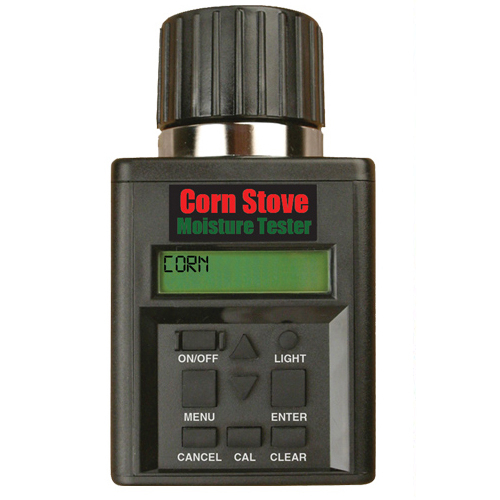
This tester is used to avoid cold stove downtime and prevent corn spoilage and toxic molds. Manufacturer recommends this device, because corn with a high moisture concentration may stop the corn stove operation. Follow the manufacturer’s manuals to provide proper corn stove operation.
Step 1:
The corn grade can be fixed up to 5.0% by increments of 0.1% to more precisely match the results of an elevator tester.
Step 2:
Examine the corn chosen, using the sample you want to. When you get the valid moisture press the CAL button (A).
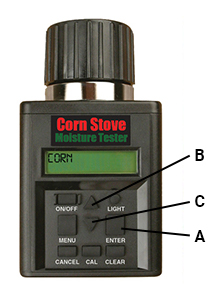
*Note: Calibration can’t be accomplished if the valid moisture hasn’t been performed.
Step 3:
When you press the CAL button (A), the tester will show the achieved moisture readings on the display and the present counterbalance valid to that moisture grade.
Step 4:
To increase the adjustment number press the up arrow (B) or down arrow (C) to lower. The tester will add or remove the results up to 5.0% by increments of 0.1% to the present moisture grade.
Step 5:
When the adjustment number is selected, press the CAL button (A) again to turn back to corn tester mode.
*Note: You can’t make the adjustment yp factory calibration to provide moisture readings in the tester that displays less than 5% or too wet results.
How to prepare the AgraTronix 07140 for the measuring test
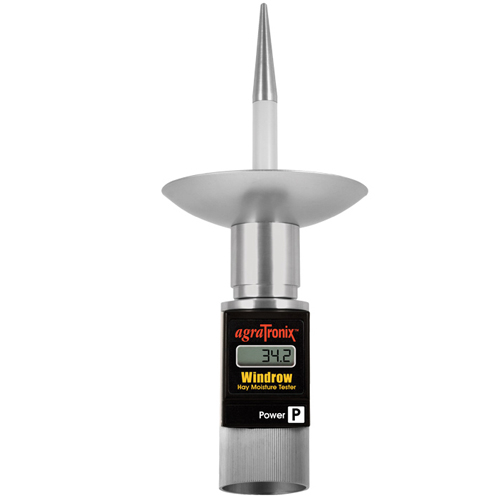
This Windrow Moisture Tester is used to measure windrow hay in a 5-gallon bucket only. Don’t try to test any other types of baled hay or hay stack/pile. This device is not a probe-style moisture meter. Use the product for its purpose as described in manuals.
Step 1:
Place the 9-volt battery in the battery case that is on the bottom of the tester. Pay attention to match the battery to the tester’s polarity markings.
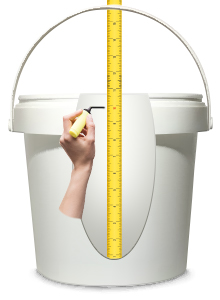
Step 2:
Take a clean dry 5-gallon bucket and measure 10 inches up from its bottom with a tape measure or ruler and mark with a black electrical tape or a black permanent marker.
*Note: Measuring 10 inches up in your bucket ensures you that the tester’s sensor tip won’t get closer than 3 inches from the bottom. If the sensor tip touches the bottom it may get false readings.
Step 3:
Connect the sensor with the tester’s body by screwing and fixing it in a clockwise direction. The sensor should be tight, but no more than hand-tightened.
*Warnings:
- It is prohibited to touch the sensor tip with your hand. You may touch the tester’s body only.
- Don’t angle the tester when testing as it may cause inaccurate readings. Keep it vertical for better results.
- Don’t use the moisture tester when the LOBAT (low battery) is on the display, to avoid false readings.
- Don’t leave the tester and its parts in water and don’t leave the device outside, avoid children playing with it.
Moisture Meter Reading’s errors
If the moisture tester display fades/dims or shows ‘LOBAT’, the meter itself cannot perform its function, or you simply cannot turn the tester on - check the battery level: charge it, otherwise replace the battery (use 9-volt ALKALINE batteries only!) and run a calibration check.
The 44.4 error - the display shows it when you install the battery and press any of the buttons for the first time. It is a norm that tells you ‘the meter is initializing’.
The 99.9 error is a notification that your moisture/temperature readings are above 45%/225˚F (99˚C). The 00.0 error means that your moisture/temperature readings are below 8.0%/32˚F (0˚C) accordingly.
Tips for proper use of the moisture meter
To get accurate results, take different readings in various parts of a bale. As the bale may be tighter/looser in some places, the reading will vary. There is no need to average readings. After making 5-10 samples, take the highest reading as the main one. For more accurate readings, you can clean the tip of the moisture meter before each sample.
It often happens that inaccurate reading may be caused by the dirty pin/tip of a pin-type moisture meter. To prevent damages and replacement of the pin/tip, clean it after every use, keep the moisture tester in a dry place, and remove the battery if you are not going to use the device for several months.
If the moisture meter was created and calibrated to measure moisture in a bale, then use it only for its intended purpose. Otherwise, you will not get accurate results.


